CK has large water areas Matcha can explore. I’ve had trouble getting them right. I’ve tried a few different assets. The best solution I’ve found is Stylized Water 2 (SW2) with the underwater extension from Staggart Creations. Easy to use, with a bunch o’ nice options.
It’s also good at detecting whether your rendering pipeline is set up right. I appreciate the work Staggart did. Makes my life easier.
There’s an issue, though. When working on CK, sometimes the editor turns gray. I can’t see any GameObjects. It looks like this:

After much googling and hair loss, I found a solution: disable Opaque Texture in the render asset.
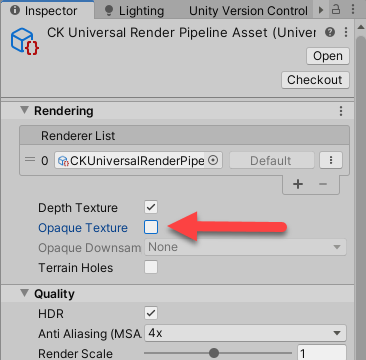
This is not a Staggart problem; it’s a Unity problem.
But… Stylized Water 2 says:
The OPAQUE TEXTURE is used for the refraction effect, and is required when it is enabled.
Well, poop. How does that affect the look, especially underwater? Refraction would seem like a thing that would matter underwater, right?
In the test game here, having Opaque Texture on didn’t cause the editor to flake out. It may be the gray issue is an interaction effect, that is, it only happens when Opaque Texture is on, and some other feature is on as well. So it’s possible the solutions explored here won’t generalize to CK.
Onward!
This post documents experiments in watering, with Stylized Water 2, the underwater extension, and opaqueless texture.
The usual note: I am an expert in neither Unity nor SW2. There are probably better ways to do things.
Seriously, I don’t know what I’m doing much of the time.
Goals
CK is a first-person game. Here’s what I’d like to achieve:
- Graphics settings
- Windows desktop
- URP
- Opaque Texture off 🙁
- Surface
- Waves in larger water areas. Rolling, not too rough.
- Foam. At the shoreline, and on the waves.
- Underwater
- Fuzzy.
- Limited vision range.
- Transition
- Doesn’t suck.
In a first-person game, the camera can be partially underwater. That’s the transition area. It should be a mix of the above-water look at the top of the screen, and the below-water look at the bottom.

Deferred rendering path
The shader docs say:
It will always render in Forward rendering, due to its transparent nature.
CK uses deferred rendering because… I forget exactly why, but I couldn’t get some lighting right with the forward renderer.
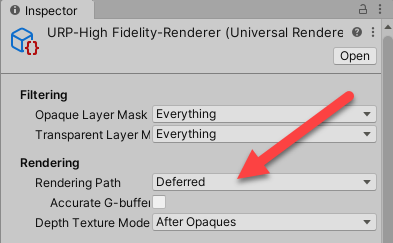
So, I was worried that SW2 wouldn’t work. Turned out not to be an issue.
Test scene
I made a test scene using my ol’ pal MicroVerse. Just a buncha pits. There’s post on pitting MV.
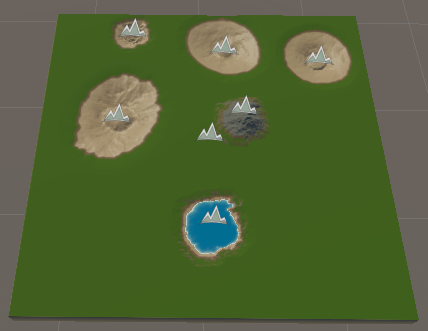
I used one SW2 prefab on each pit. Five prefabs, five pits. The thing in the middle is a mountain, added because… reasons.
A prefab problem made experimenting difficult
Normally, when I’m experimenting with an asset’s prefabs, I’ll make a copy of them, and change the copy. So, if I mess up the settings, I still have the original.
It’s easy. Select the prefab in the asset folder, duplicate it, and rename it, like adding my initials to the end.

Now I move the prefab to my own prefab folder. I put all game-specific assets in a folder called _Game.
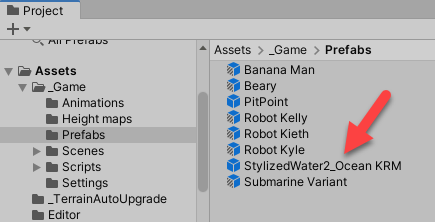
With SW2, when I changed the copy, I noticed something strange. When I’m working on prefabs, I turn Auto Save off, so if I mess up, I can just not save the changes.

I edited the prefab copy’s properties, and expected the Save button to be enabled, as usual. For example, when I edited a copy of a submarine prefab, the Save button is enabled:

AFAIK, this has always worked, with any prefab.
But when I changed the properties of my copy of an SW2 prefab, the Save button was not enabled.
“Huh,” I thought to myself.
So I checked the original. Turns out, changes I made to the copy of the prefab were not only saved immediately, but also changed the original prefab, in the SW2 asset folder.
“Huh!” I thought to myself.
(Again, I point out that I don’t know what I’m doing much of the time. There could be something I don’t know about.)
This made experimentation tricky, as you can imagine. To get back to the original settings, I could not simply delete my altered prefab copy, and replace it with a fresh copy of the original.
What I did is make a separate project, and import SW2 into that. Then I could compare settings of prefabs in my test game with the clean copy in the new project.
Trying stuff
In all cases, I started with the five water prefabs supplied with SW2. They use materials with a shader doing watery things.
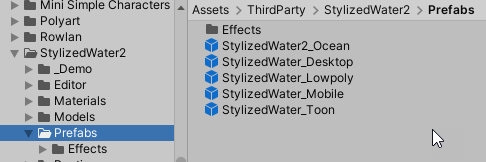
To summarize:
Wow!
The water looks fantastic, out of the box. Here’s the ocean prefab, with a cool submarine from the asset store.
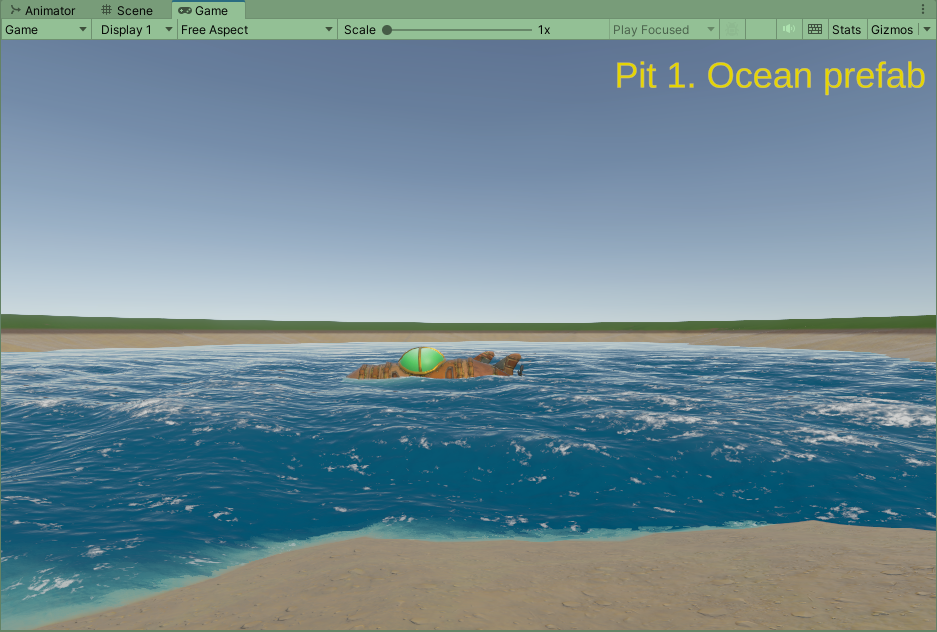
I didn’t notice much of a difference with Opaque Texture off. Hooray!
I used the advanced rendering mode:
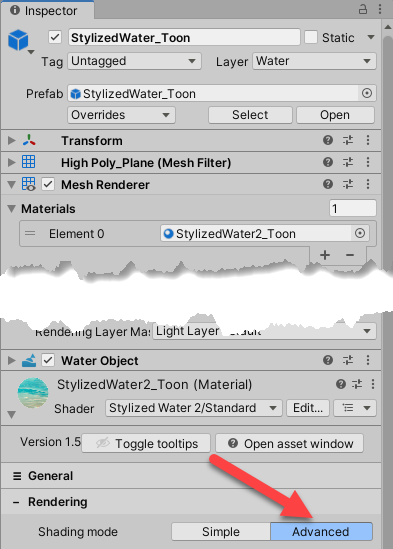
The docs say:
The advanced shading mode takes more liberty and focuses on high-end rendering. If water in your game is only something that’s viewed in the background, or viewed from a top-down perspective it will offer little benefit.
Since CK players go into the water, advanced seemed a better fit.
Many settings
There are about a bazillion settings in SW 2. I don’t understand them all, and don’t have time to experiment with everyone, let alone their interactions. Sometimes, changing a setting (like wave speed multiplier) would mess things up.
I recommend picking one of the prefabs SW 2 supplies, and making as few changes as possible.
Transition artifacts
Sometimes, I got transition artifacts, like this:
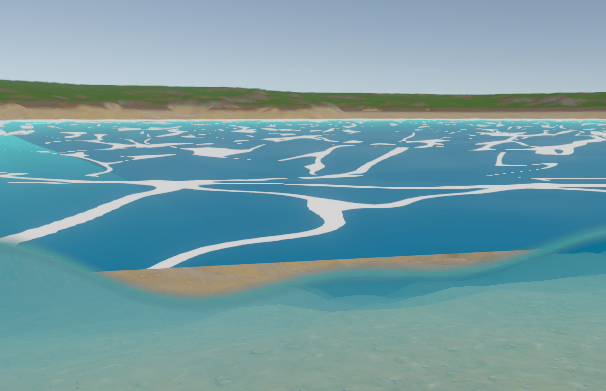
This is from the toon prefab. Notice the sand is showing.
It seems the bigger the waves are, the more artifacts there are. When I set the waves low, the artifacts disappeared.
This isn’t a bit deal. Players don’t hang out in transition areas (I imagine). I’ve seen similar problems in AAA games. FarCry 6, for example, if I recall correctly, though maybe not.
Transitioning too soon
This is more of a concern. There are times when you can see the transition when you haven’t left the beach:
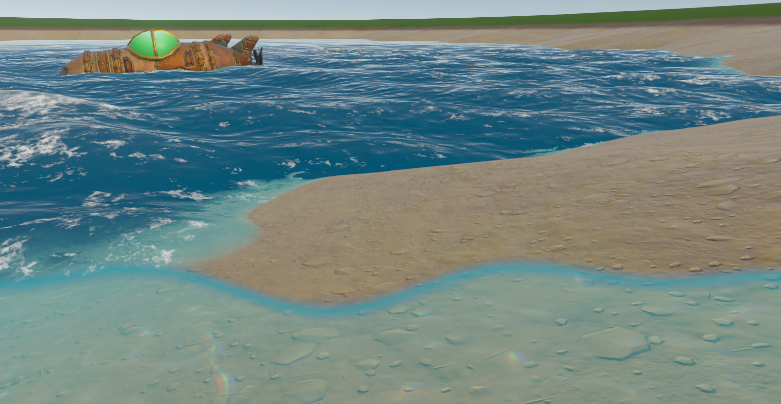
The slope of the beach seems to affect the issue. The beach above has a small slope. When beaches have a higher gradient, the issue is less pronounced, or goes away altogether. I could be wrong about the slope effect, though. That’s what I inferred from my messing around, but I may have the wrong end of the stick. (Is that still an expression?)
If the slope is indeed the culprit (damn your eyes, slope!), a solution in MicroVerse might be to:
- Duplicate the height stamp used to make your pit. Let’s call the original one Biggy, and the duplicate Smally.
- Make Smally slightly smaller on X and Z, but larger on Y. So Smally will have a sharper slope than Biggy.
- Make Biggy and Smally concentric.
- Size the SW2 prefab to cover Smally.
That might give you a relatively flat beach, then a sudden dropoff into the water where Biggy and Smally overlap. I haven’t tried this yet, so it might not work.
Recommendations
Stylized Water 2 (SW2) makes great-looking water. It’s convenient to use (mostly). SW2 will tell you about problems with your graphics setup, and offer to fix them when it can. SW2 works well when Opaque Texture is off.
The only usability issue I found is when I changed a copy of an SW 2 prefab, the original prefab changes are well. Though I might be doing something wrong.
I recommend picking a prefab for your game, and making as few changes as possible. There are so many settings that it’s easy to mess up the look.
For a third-person or top-down game, you may not need to make any adjustments. For a first-person game, you might need to use the beach trick above.
