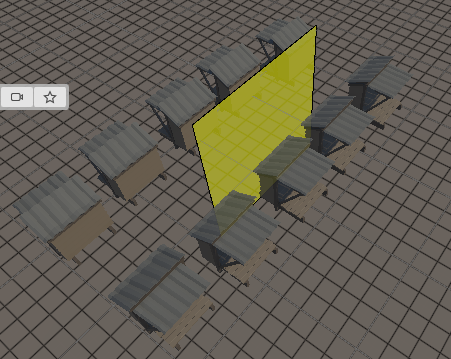
Octave 3D is a way cool plugin for making levels in Unity. Octave makes it easier to make levels. Andrew, the dev, has put much thought into special features that help with different tasks. For example, when you add rocks to a level, you want them to match the slope of the terrain. That’s how rocks do. Trees, on the other hand, grow straight up, even on a slope. Octave 3D allows for that.
However, Octave is a complex tool, with many settings. I found it hard to learn. One reason is that the docs are a set of videos (mostly). They’re good. However, after you start working with Octave, you need to look up techniques to use. That’s hard to do with videos.
Here are some notes I made from the tutorial videos. There are probably mistakes, and there are some things I didn’t understand.
Andrew, if you ever read this, maybe you could make a documentation wiki. You and Octave users could fill it in, so you wouldn’t have to do it all yourself.
These notes are for version 2.4.3.5, current at the time of writing. They’re meant to be used along with the videos, not as a substitute.
Getting started
In a scene, make an MT game object. Add the Octave 3D Word Builder script to the MT GO.
Keep the GO selected, to use Octave 3D.
The scene must be selected for shortcut keys to work.
Make sure gizmos are on, to see the location guide.
It’s about the prefabs
Octave helps you build levels from prefabs. For example, say you’re making a game with inside and outside levels, like Cryptid Kitchen. You buy asset packs like Tidal Flask’s village pack, interior pack, and nature pack. The packs have with many matching prefabs, like trees, bushes, houses, fences, barrels, walls, plates, etc.
For outside scenes, you make a terrain, using Tidal Flask’s grass, rock, and sand textures. Then you scatter trees, bushes, rocks, and other prefabs, with Octave.
For inside scenes, you make a floor with prefabs arranged in a grid. You add walls, and drop in props, like tables, chairs, and stoves. Octave makes all of this easier.
Octave’s prefab manager is one of its most important features. The basic workflow is to choose a prefab in the manager, and drop it in the scene. For example, here…
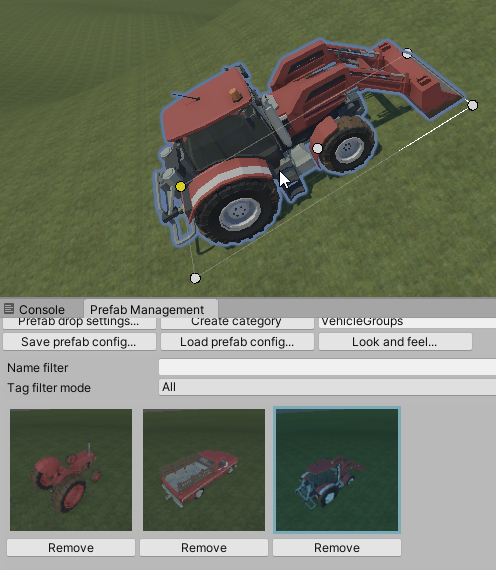
… I selected a tractor prefab in the prefab manager. Octave rotates it automatically, to match the terrain’s slope at the point I drop the prefab.
Organizing prefabs is central to making Octave work for you. Let’s see how Octave helps you manage prefabs.
Organizing prefabs
Categories
A category is a set of related prefabs, like Walls, Doors, and Props. Before you insert new instances into the scene, select one of the prefabs from a category.
(Categories and groups are different. A category is a set of prefabs. A group is a set of prefab instances, like First Floor, Second Floor, Atrium, etc.).
There will always be at least one category, called Default.
Open the prefab manager with the Prefab button:
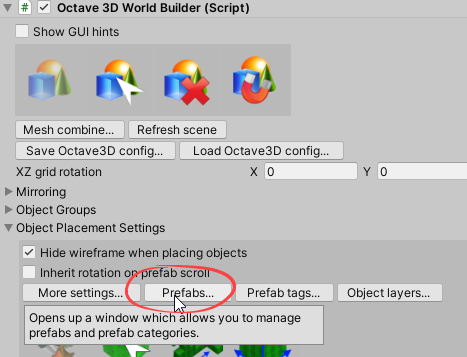
You can move the window around as usual in Unity. I like to docked it with the console (below).
Make categories in the Prefab Management window. Type in a category name, and click Create category.
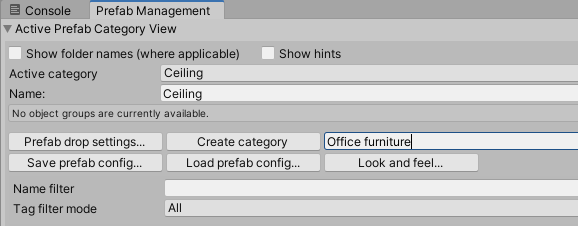
Drag prefabs into categories from an asset library.
Note: at the time of writing, there seems to be a bug that sometimes shows the wrong mesh in the preview area. Here, I added a tractor to the Vehicle category:
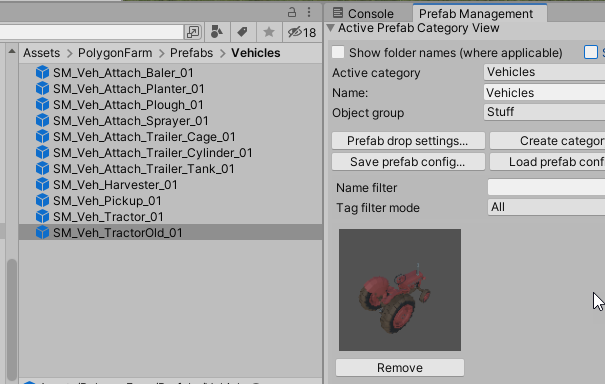
Now I click on the pickup. The skinned pickup mesh shows in the preview window in the inspector, as expected. Now I drag the prefab into the category:
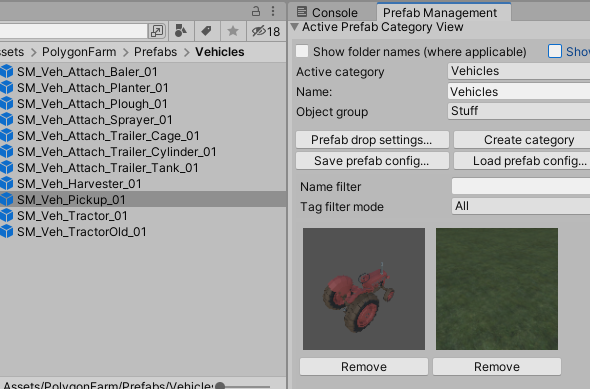
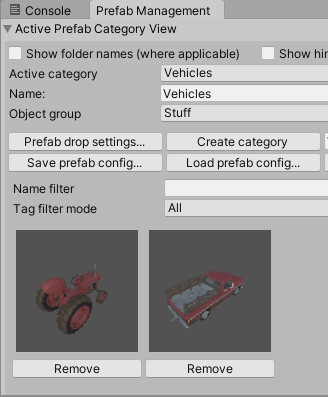
The wrong thing shows. Grass, not a pickup. Hover over the preview, and Octave says it’s a pickup, though. Insert the prefab into the scene, and you get a pickup. Close and re-open the prefab manager, problem is still there. Close and reopen Unity, and it’s hunky-dory.
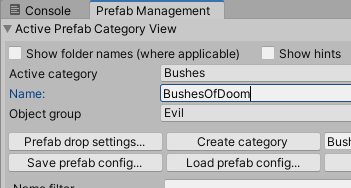
You can rename categories:
You can move prefabs into different categories.
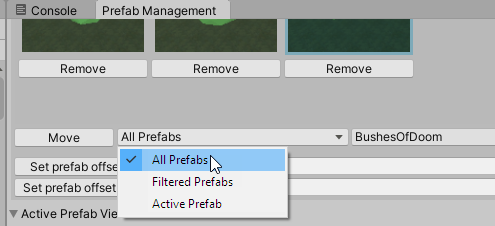
Filter by active tags (see below), or by name.
You can ask Octave to find the active prefab in the project window:
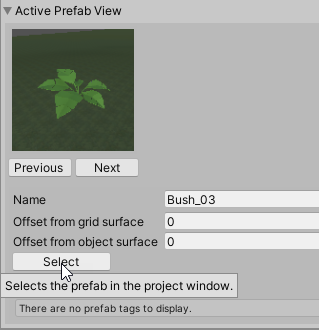
Folders
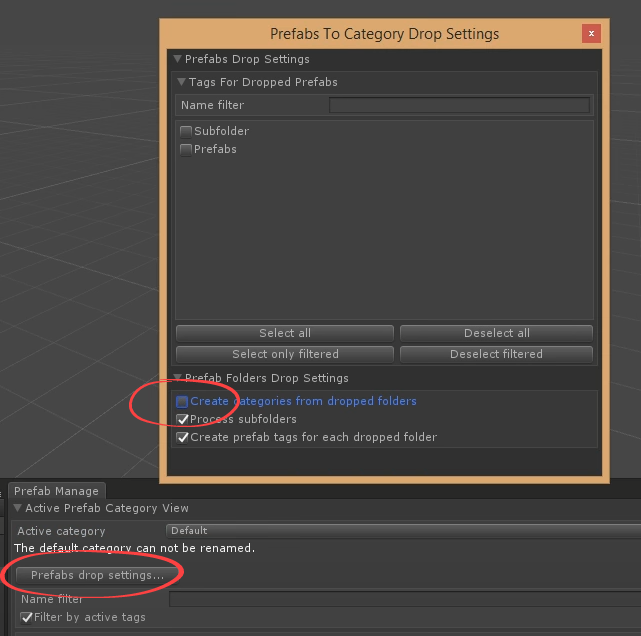
If you drag folders with prefabs, Octave will make categories from the folders. A Good Thing.
You can change this behavior. For example, have Octave add prefabs from the folder to the active category.
Subfolders
If there are subfolders, Octave will make a category for each subfolder.
You can change the subfolder behavior:
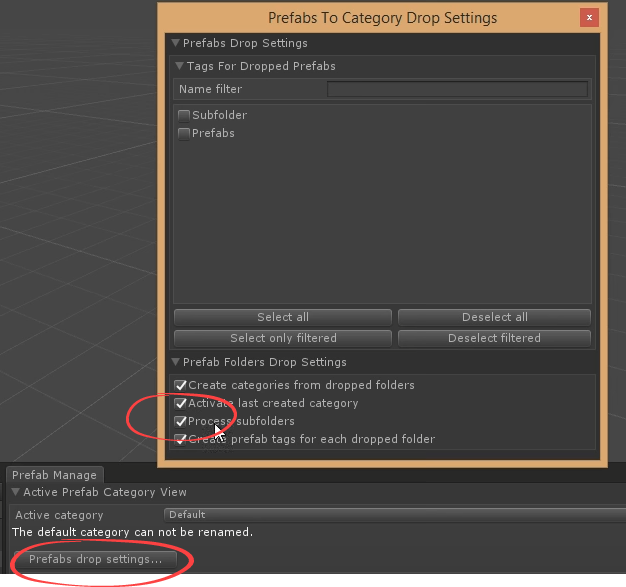
Octave will make one category for the main folder, and put all prefabs from all subfolders into it.
Uncheck “Create categories from dropped folders,” and Octave will not create new categories from folders. New prefabs will be added to the active category.
Right-click in the prefab management window to remove a category:

There doesn’t seem to be a button for this, but I could be wrong.
Groups
When you add objects, you can add them to a group. They will be made children of the group in the hierarchy, so they can be turned on and off together. So, each Octave group has a GO in the hierarchy that’s a parent of other GOs.
Parent GOs are not always groups. You can tell Octave to make a parent a group by right-clicking, and…
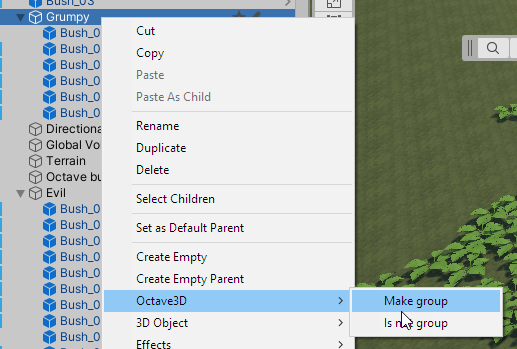
When you add objects to the scene, they’re put in a group you’ve specified:
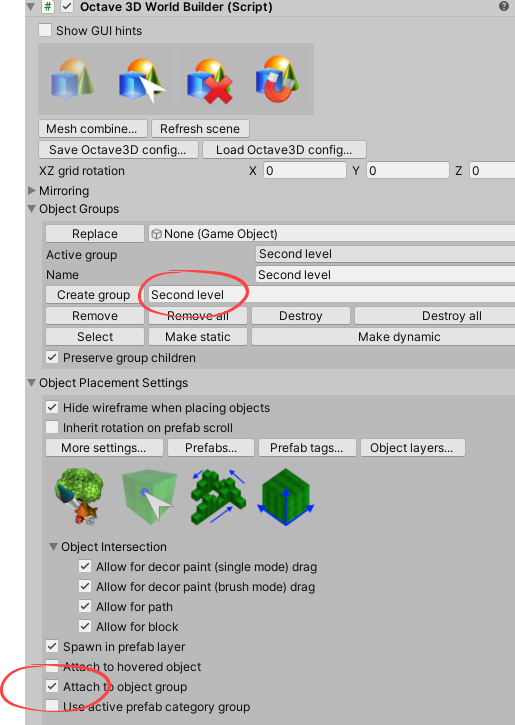
Be sure to have Attach to object group checked.
To reassign GOs to different groups, choose the Octave GO in the hierarchy, enter object selection mode, select the GOs (drag across them, or Ctrl+click), and…
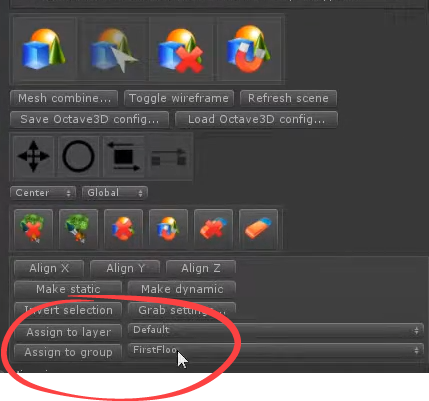
Note: moving objects in the hierarchy doesn’t have the same effect. Or it might, after refreshing. I’m not sure.
Groups can be nested.
Groups and categories can be linked…
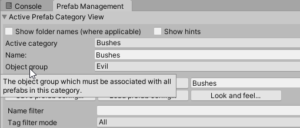
… but I don’t know what that means. (It was in a video, but I didn’t grok it.)
Prefab tags
Another way to create prefab sets. You can have prefabs in the same category separated into sets. Prefabs across categories can have the same tags.
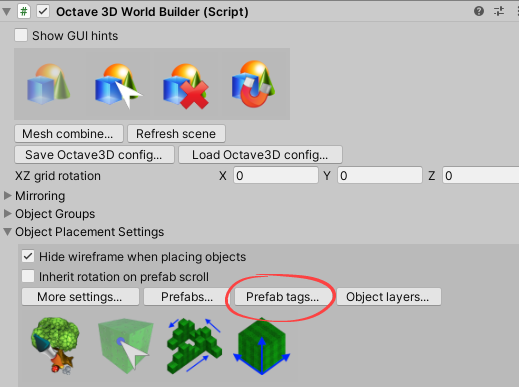
Open the Prefab Tags window to mess with tags:
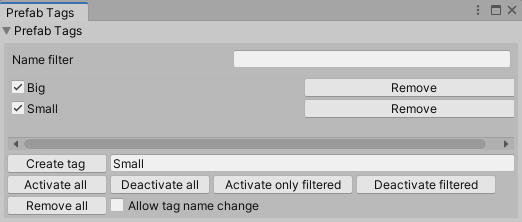
An example. Suppose you have three categories: Plants, Rocks, and Vehicles. Some prefabs are big (like trees), some are small (like flowers). You create two tags:
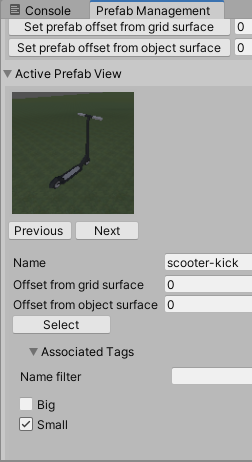
You apply a tag to each prefab:
You apply the tags to the prefabs in the categories:
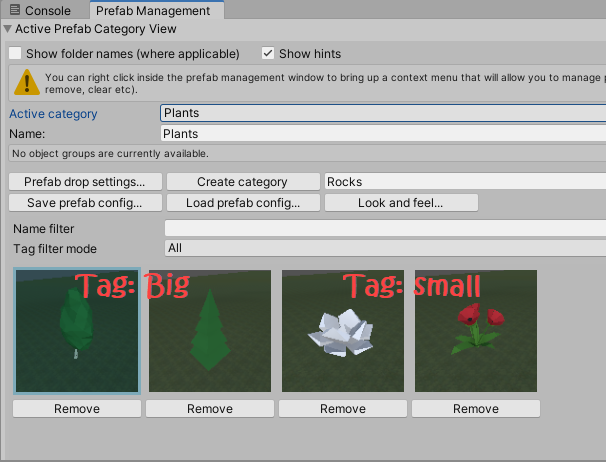
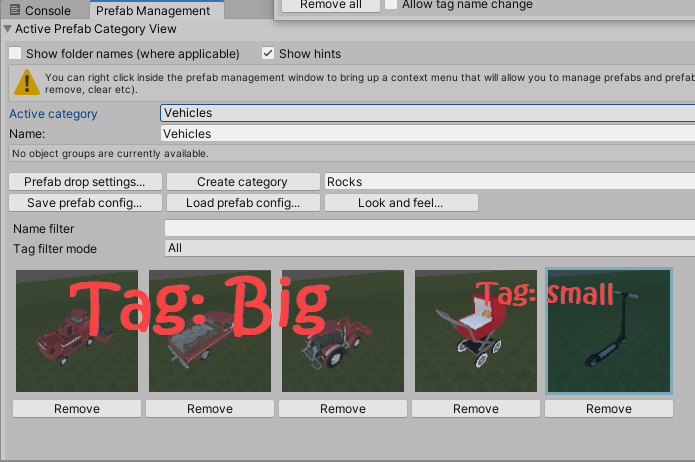
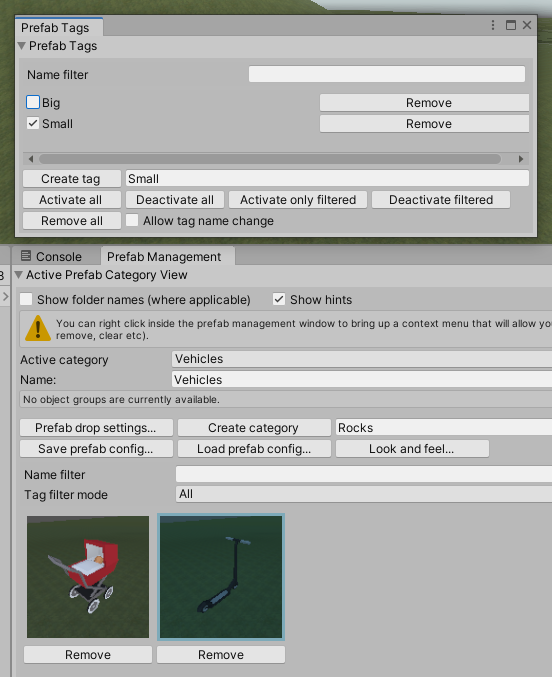
Say you’re adding vehicles to an area where only small vehicles make sense, like a park. You can use the tag window to limit Octave to prefabs with the small tag.
Another example: if you want to create areas with certain colors, you could tag prefabs by color (blue, green, whatevs).
You can assign more than one tag to a prefab, like Vehicle, Blue, and Big. Maybe the Tardis?
Octave can add tags automatically from folder names, when you add prefabs to categories.
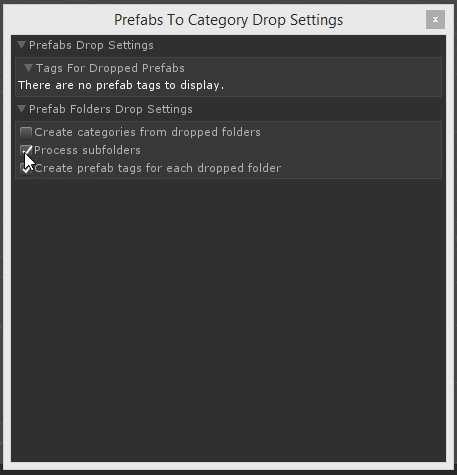
Nice if you have an asset pack where assets are grouped into sensibly named folders. (You can create categories based on subfolder as well. See above.)
You can also have Octave add tags for you, when you drag a prefab into a category. Say I have a bumper car that I want to be tagged as small. I haven’t added it to any category yet.
Set the Small checkboxes as shown:
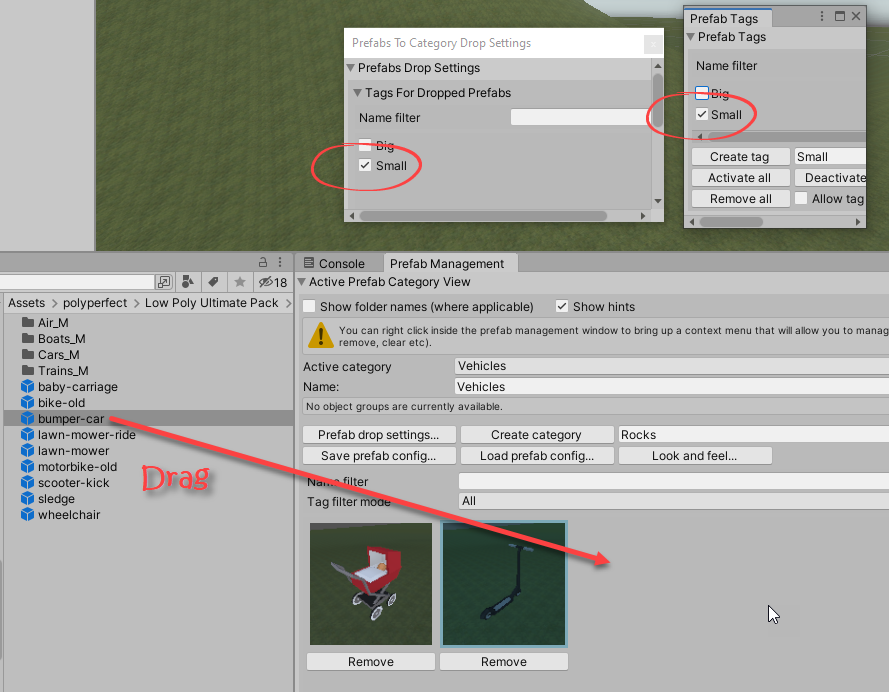
Drag the new prefab into the category, Vehicles in this case. The Small tag will be applied automatically.
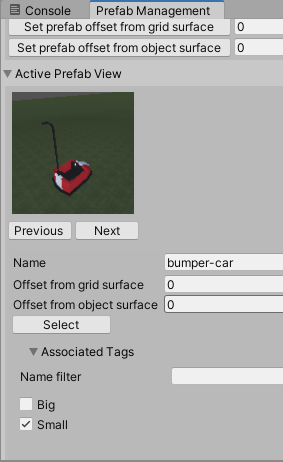
W00t!
You can rename tags. Check a box, and the tag name controls will change from labels to text boxes.
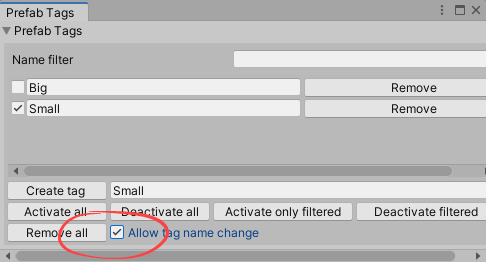
Main modes
Octave has many modes for different things. The most general mode is:
- Insert: add new objects
- Select: choose existing objects
- Delete: what it says
- Snap: manage snapping
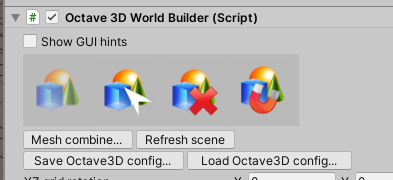
Strangely, the one that looks disabled is the current mode.
The grid is central to Octave. When you select the Octave GO, it shows its own grid, on top of Unity’s. The grid is 1 m × 1 m. Here are four 1 m × 1 m floor tiles:
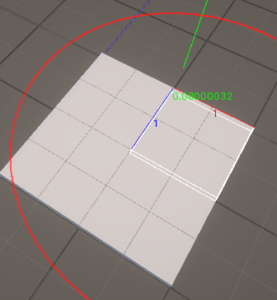
They have a grid pattern in their texture. The red, green, and blue numbers show the size of the selected GO’s bounding box, using a command from MonKey.
New prefabs snap to the grid, or to another object. U key toggles object snapping. If it’s off, you snap to the grid.
When inserting, there are object placement settings:
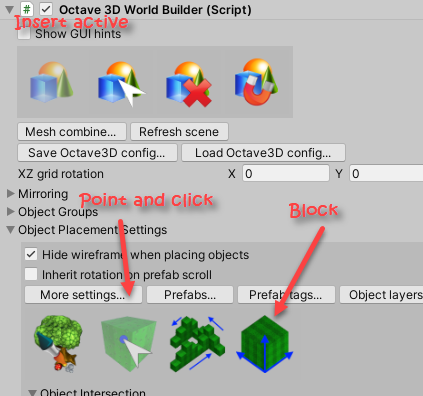
Point and click adds one object.
Block lets you drag, and add many of the same object, like floor tiles. I thought it would work by dragging the mouse, but it doesn’t.
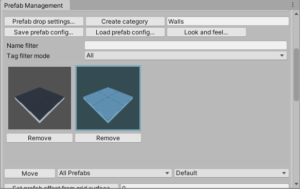
Say you want to draw a rectangle of floor times. First, choose the prefab you want in the prefab manager:
Move the mouse to one corner of the area you want to fill:
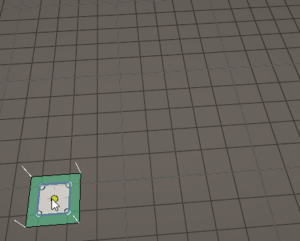
Click. The prefab will vanish—don’t worry, that’s just how Octave do. Move the mouse to the other corner of the area you want to fill:
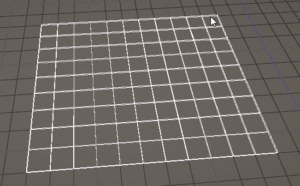
Click again, and the prefabs will fill the area.
Another way to create many prefabs at once is to switch to selection mode, select some objects, and extrude. Enter selection mode, and select some objects (Ctrl+click on them, or drag across an area). Choose extrude mode…
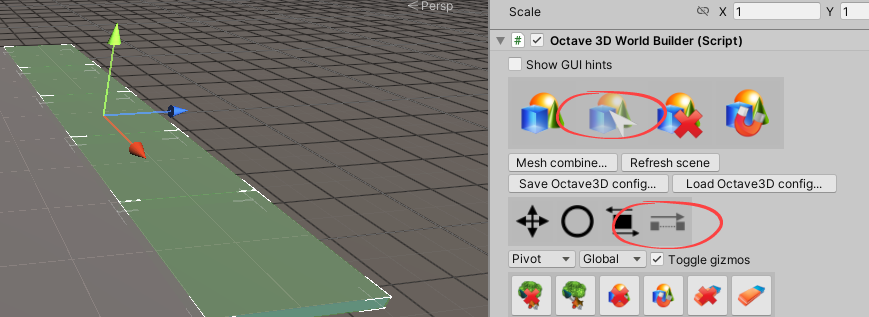
Hold down Ctrl, and drag one of the dimension arrows on the gizmo, to duplicate objects.
You can select more than one GO type to extrude. Here, I’ve selected floor tiles, and office cabinets:
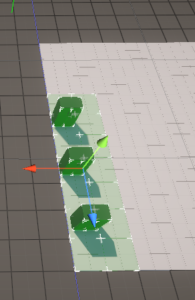
Ctrl+click on the red arrow, and:
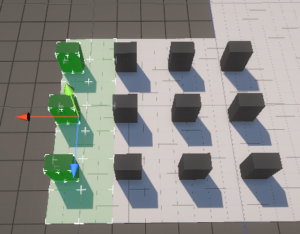
Set extrude snap step…
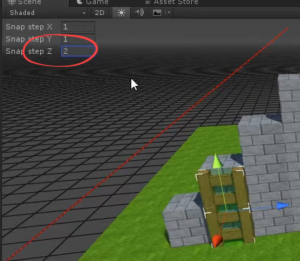
… to duplicate in only some positions.
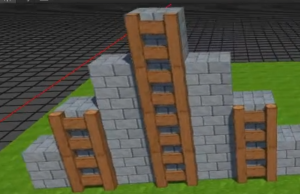
Bricks extruded with snap step of 1, ladders with 2.
When inserting/changing GOs, press Y to rotate it 90 degrees in Y. Same for X and Z.
In select mode, can use Ctrl+D to duplicate. Works with one or many objects selected.
Octave gives some useful status info in the design window:
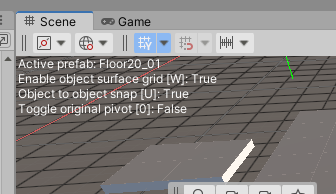
In selection mode, when you double-click on a GO, Octave will select all the active GOs using the same prefab. Deactivate GOs before double-clicking, to exclude them from the selection. Grouping prefabs (below) makes this easier.
When object snapping is too fiddly to work well, try vertex snapping. Hold down V, and choose the vertex to snap.
Moving the grid
Say you’ve made a floor and some walls, not want to add a ceiling. It helps to move the grid up to the top of the wall.
In Insert mode, hold down T, and double-click above the center line of a wall GO. The grid will move to the top of the wall GO.

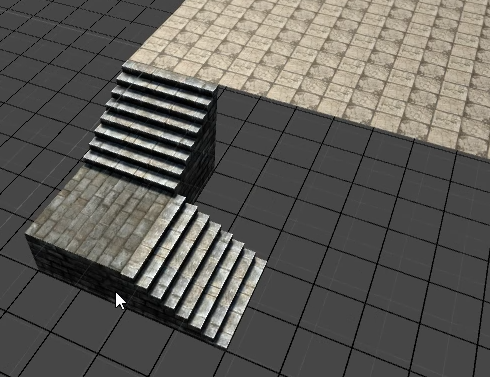
You can move the grid down with the N key. For example, these stairs are selected, and on the floor:
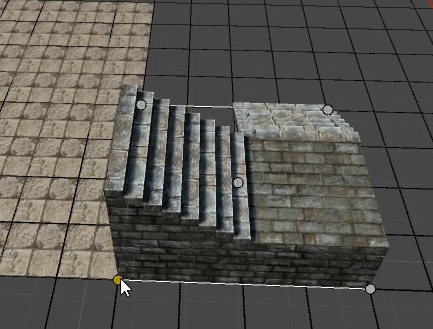
Press N to drop the grid:
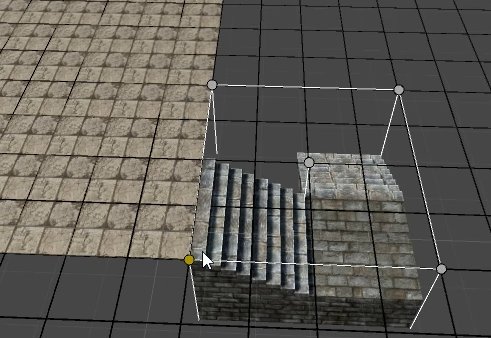
The top of the stairs aligns with the bottom of the floor.
The grid is still at the top of the stairs, though. To move it to the bottom, hold down T, hover the mouse cursor towards the bottom of the stairs, then double-click. The grid will move down.
For a second level, we could add tiles as before, but there is an easier way: project the floor tiles onto the grid at the ceiling level, and replace the floor tiles with the ceiling tiles.
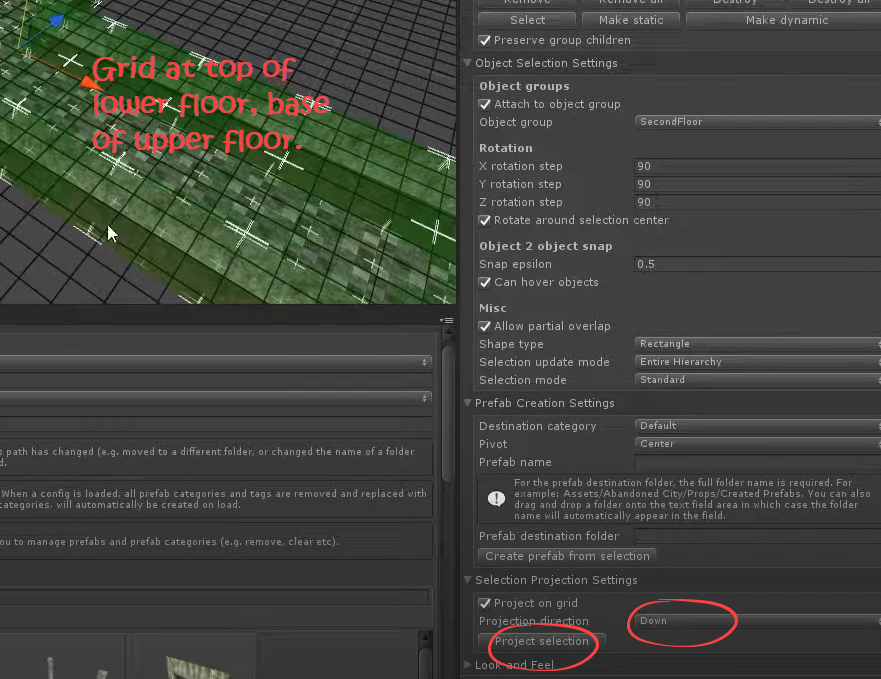
Switch to selection mode, then select all the floor objects (e.g., double-click on one to select all with the game prefab). Duplicate them (Ctrl+D). In the selection project settings, check Project on grid, set the direction, and click Project selection.
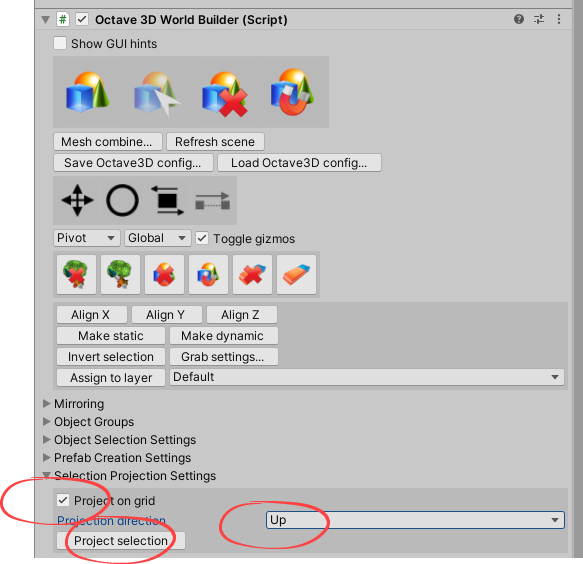
(To select only some tiles using the double-click thing, first set groups you don’t want to select to inactive, before double-clicking.)
The tiles just duplicated will be projected up to the current grid.
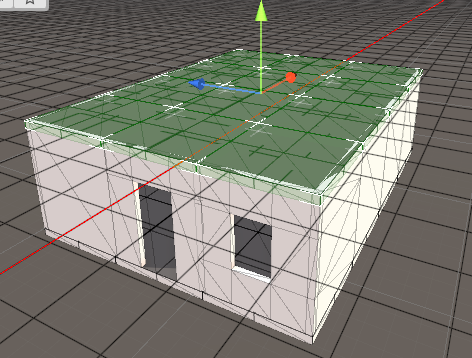
To make them use the ceiling prefab, go into that category, find the one you want, and click on it.
Make a second floor
Make a second floor by selecting all the elements of the first floor, duplicate, and move up. As with floors earlier, but include walls as well.
To select all, use groups. That is, put items to duplicate in a group, select the group, and duplicate. Put the duplicates in a new group for the second floor.
Move grid to top.
Select all first floor objects:
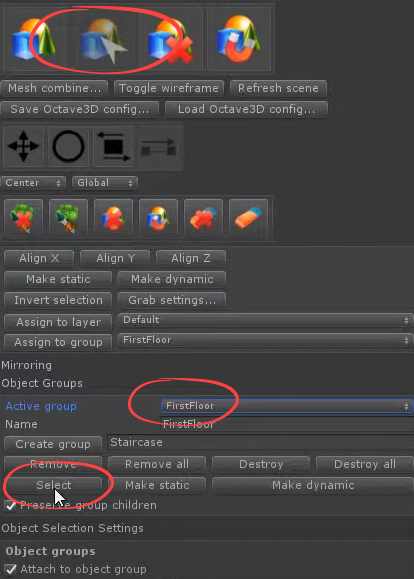
Now you want to duplicate them into another group. Before that, make the destination group. Select it as the destination of new objects:
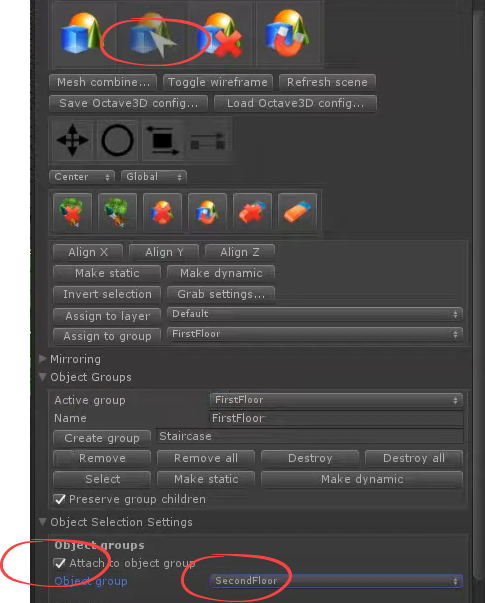
(The UI has two sets of groupy options. Use the right one.)
Now duplicate (Ctrl+D).
Now project to grid (which is at the top of the lower floor, bottom of upper floor). Project down.
Placing props
Make categories for them. The use Insert|Decore Paint mode. Decore Paint is the best mode for working with props.
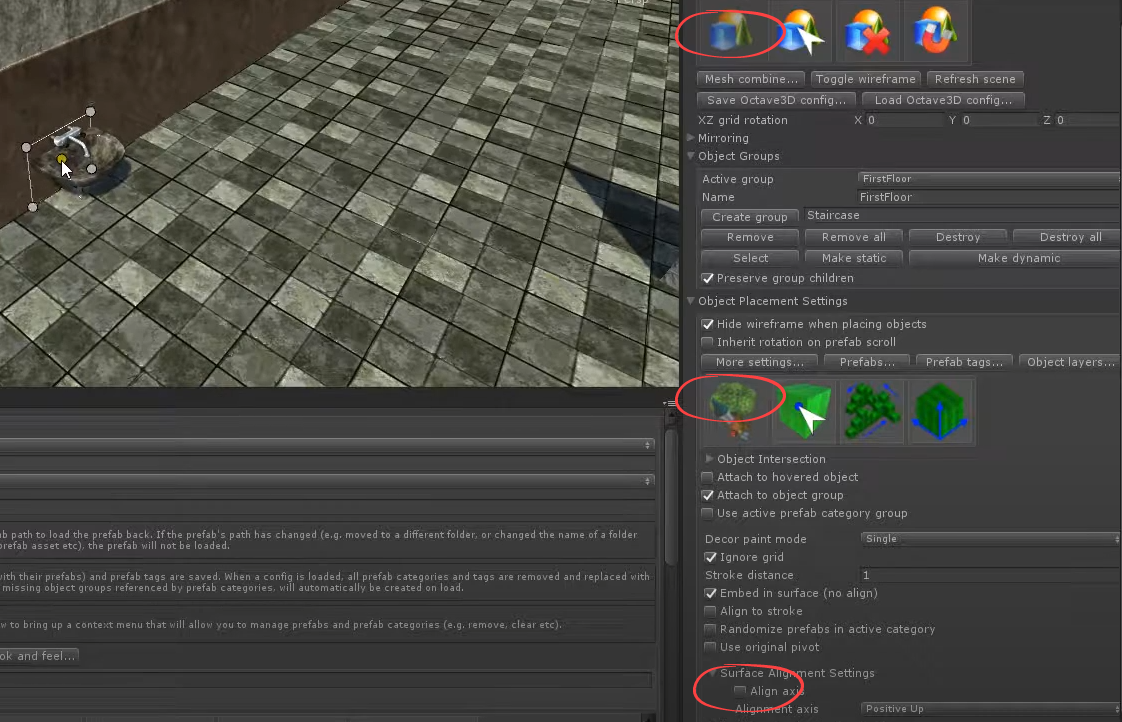
If align axis off (as above), rotate the objects manually. Otherwise, they snap to planes. (Probably want it on for normal prop placement?)
Hold shift+C and move mouse to rotate. (I had trouble getting this to work consistently. Maybe depends on axis alignment option not being selected?)
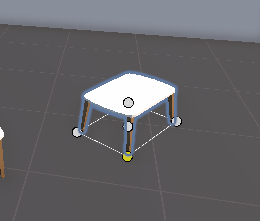
Press I to reset rotation.
Press X, Y, Z to rotate in 90 degrees on matching axis.
Shift + X (Y, Z) to rotate with mouse around those axes. Shift+C rotates around the surface normal.
This works in any placement mode.
Shift + Ctrl to scale. Press O to reset the scale. This works in any placement mode.
Terrains
Use Decore paint when working with terrains. It’s the only mode that will work with terrains.
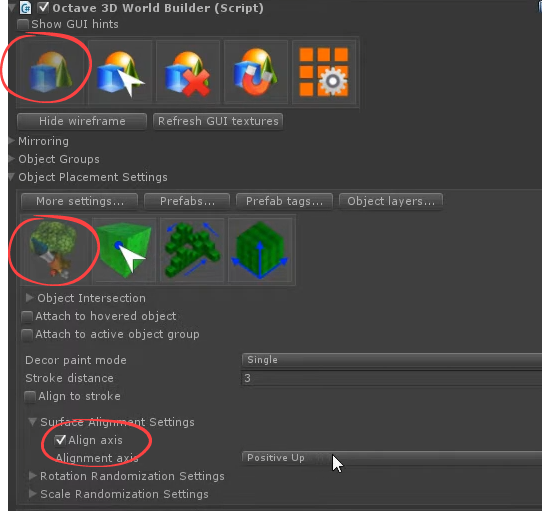
When Align axis is on, objects align to slopes. W00t!
Mess with the alignment axis if the look isn’t right, though positive up usually works.
Decore paint: Single mode
Above, the paint mode is set to single. Select a prefab, click, and Octave will position one item, adjusting to terrain slope. It’s magical!
Drag to make many. Control density with stroke distance. They’ll all be adjusted to the terrain slope individually. Even more magic!
You can randomize rotation and scale during placement.
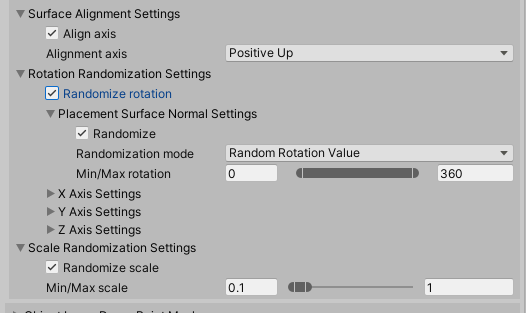
For rotation, use Placement Surface Normal to have objects match the slope of the terrain.
Can have rotation distribution continuous (Randomization Mode/Random Rotation Value), or an integral value. Give the distance between the values in Random Rotation Step.
Rotation following mouse movement
Check Align To Stroke. Select an object, like a fence component. Grab one pivot point of the location guide, usually one of the corners. Drag. New objects will align the mouse movement. Double w00t!
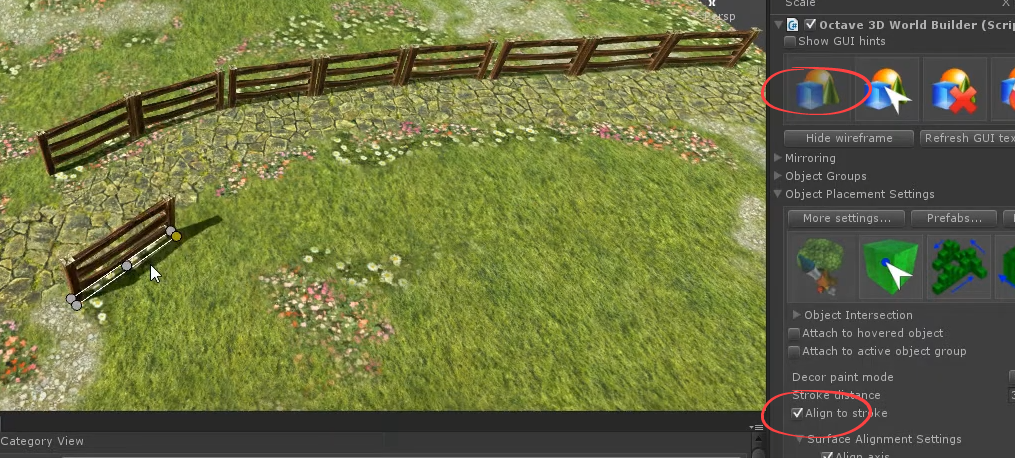
This is sensitive to mouse movement speed.
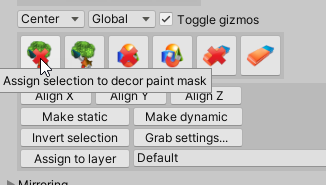
You can specify that some items are ignored when positioning others. Switch to selection mode, select the elements to ignore (e.g., with G), and click the button that assigns them to a decor mask. Those objects won’t affect positioning of new objects. (I think. Bit fuzzy on it, TBH.)
Brush mode
Lets you distribute objects by “painting” on the distribution area. W00ty w00t!
A brush is a collection of brush elements. An element is a prefab, with some settings controlling its generation by the brush.
Creating a brush:
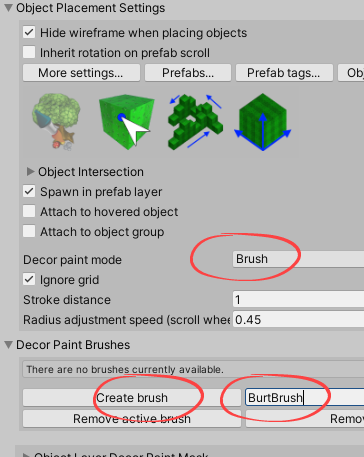
Drag prefabs to add elements to the brush.
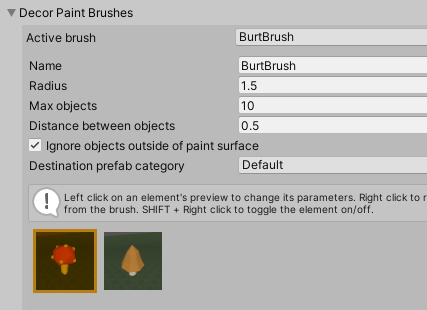
Click an element, and its deets will show up:
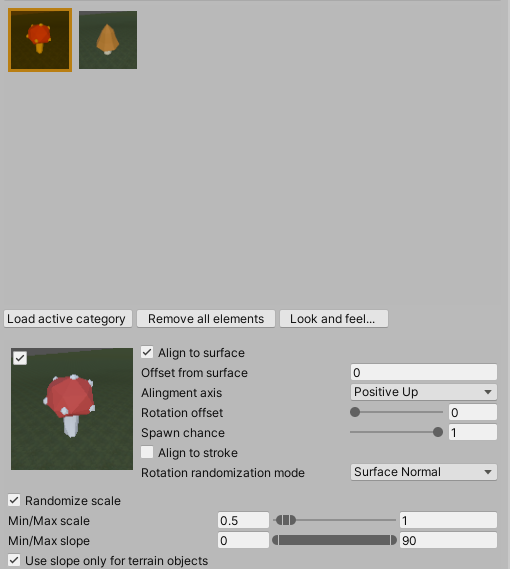
Add many prefabs, like bushes, grass, and small rocks that will be mixed together on a terrain.
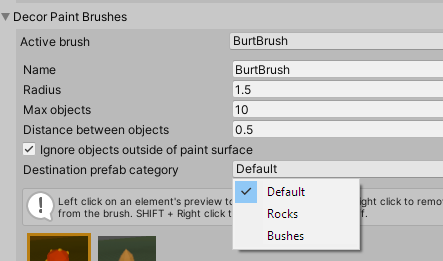
All prefabs must be in a category. When dragging new elements into brushes, what categories are they placed in? The one identified:
Here are element properties:
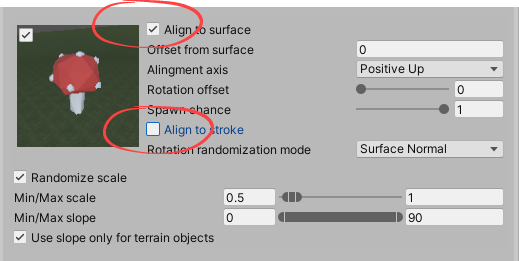
Align to surface should be checked most of the time. Align to stroke will change object rotation to follow mouse cursor when dragging.
The min/max slope will limit the slopes objects can be placed on. E.g., only place objects on slopes below 45 degrees. Another nice detail.
A hint: when placing trees, you usually don’t want them aligned to the surface. Trees don’t grow what way. Best to also turn off random rotation, or the results might look funky.
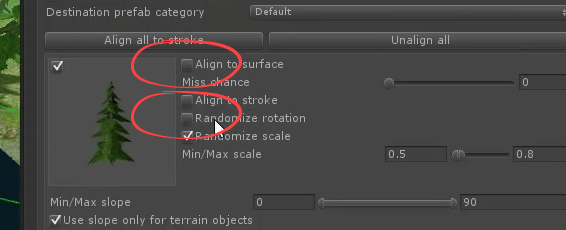
Renaming a brush is easy, but I couldn’t see an obvious way to delete a brush.
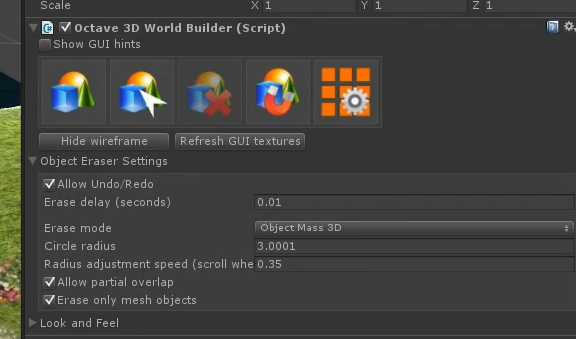
Mass erase
Does what you think. Adjust the radius for less or more destruction.
Selection grabbing
More w00tiness!
Say you have some rocks. They are rotated individually, to fit the slope of the terrain where they lie.
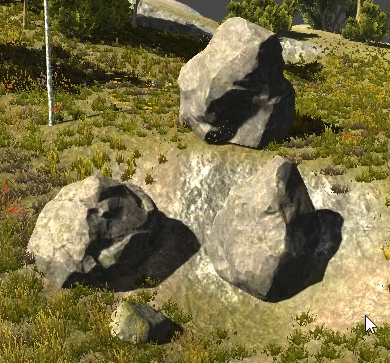
You want to move some around. Select the group, move, and each rock’s rotation will be adjusted to the terrain of whatever place they end up.
In selection mode, select the rocks you want to move. (One or more.) (Ctrl+click adds the clicked object to the selection.)
Press C (don’t hold down). That grabs the selection.
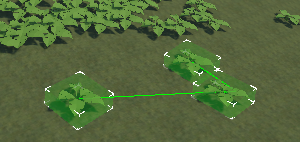
You can move them around. Slope will be adjusted for you. W00t!
Hold down shift/crtl to rotate/scale will moving.
Press C again to exit grab mode.
You can position meshes on other meshes, like a small rock on a big rock, as well as positioning objects on terrains.
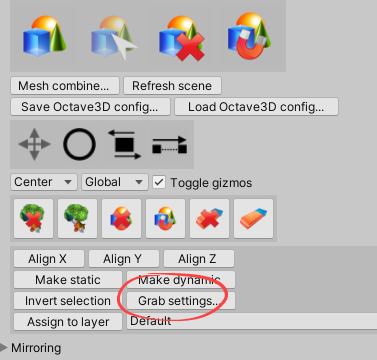
There are some grab settings:
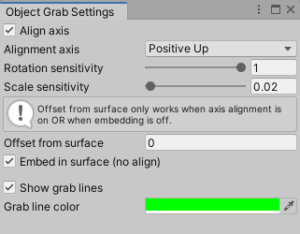
You may need to experiment with the alignment axis, for the things you’re working with.
Make Offset from surface negative, to embed objects in the ground a little.
With trees, you might want to turn off Align Axis. In that case, check Embed in surface (no align).
Working with existing scenes
Like demo scenes in assets you buy.
Groups
If you click on a GO, Octave might select too many objects…
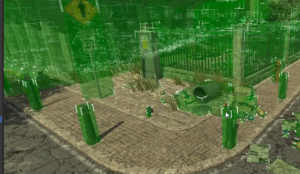
… since it doesn’t know how you want to group them.
Right-click on the GO in the hierarchy containing the object, and Make group.
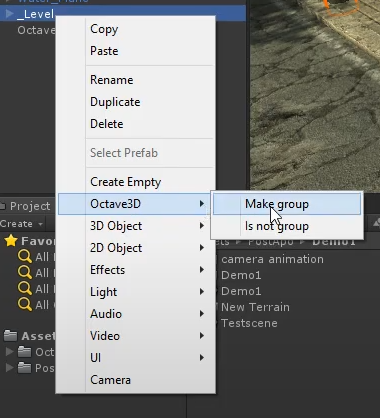
Now you can select objects individually.
Categories
You can put prefabs in the existing scene into categories. Make a new category (or use an existing one), and make it the active category (in the Prefab Manage screen). Select an existing GO in the scene, and press R. The object will be put in the category.
If a GO you’ve selected is already in a category, the selected GO will become the current object.
Reusing objects
Say you assemble a GO from several prefabs. Maybe a car made from a body, tires, etc., or an office, with a desk, chair, PC, and paintings, all carefully positioned. Octave will help you reuse the assembled GO. W00t!
Say I want to make a farmer’s meeting prefab, like this:
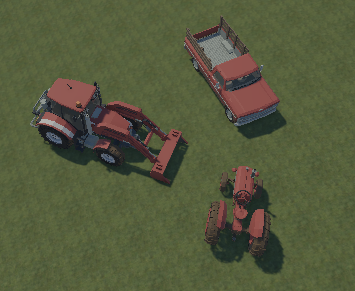
I have a Vehicles category, with these prefabs. I add them to the terrain with Decore Paint in single mode. So, when I add them, the will adjust to the terrain’s local slope.
Here’s what will make them into a prefab:
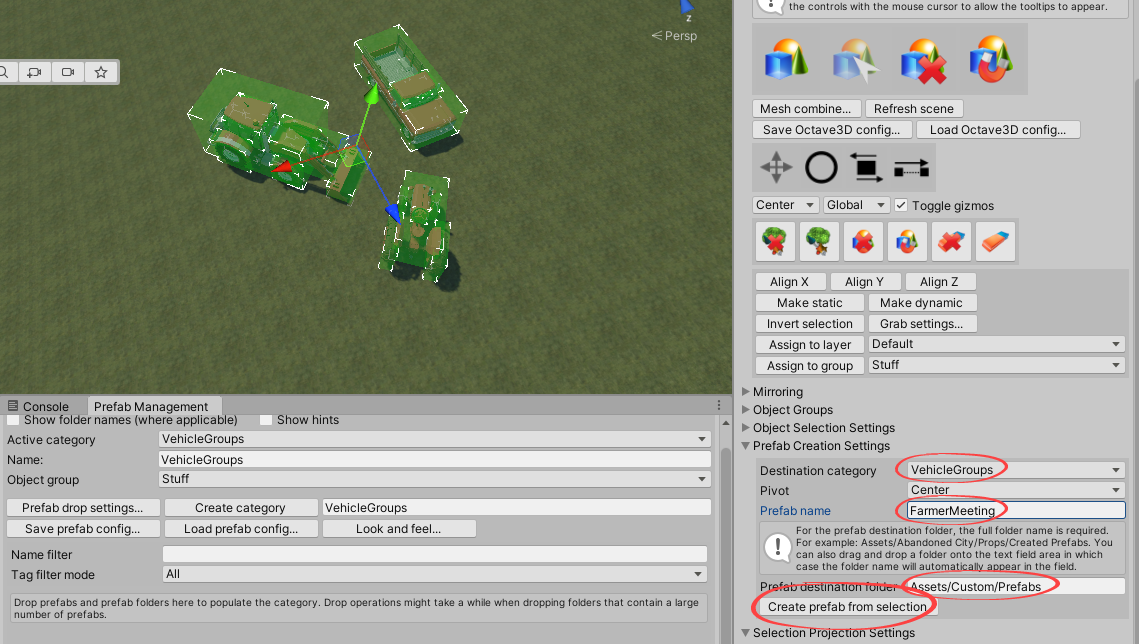
First, I created a new category, for vehicle groups, and selected it in the Prefab Creation Settings. I could have used an existing category instead.
I selected the objects I wanted in the new prefab. Ctrl+Click on them.
I’m making a new prefab, so I tell Octave what to name it, and where to put it (you can drag the destination folder from the project window). Both are required. Then click the Create button.
Here’s what was in the folder before I clicked the button:
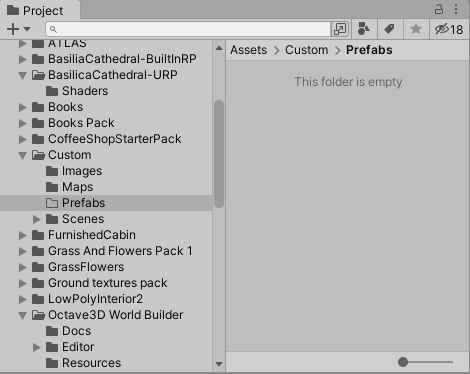
Here’s what I saw after I clicked the button:
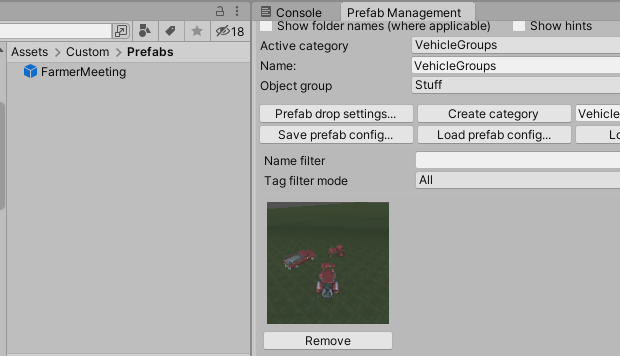
W00t! A new prefab, in the right folder, and in the right category!
I had a problem, though. When I used the prefab, Octave didn’t adjust the rotation of the individual elements to match the terrain. This makes sense, since there is one rotation for the entire assembled prefab.
The right way to do it was to use the selection grabbing feature discussed earlier. Enter selection mode, then select all three individual vehicles (click on one, then ctrl+click on the others). Ctrl+D to duplicate them. Maybe move the new objects a little to the side. Press and release C. Move the group around; just move the mouse. The individual vehicles will adjust to the slope. Press and release C again. Here’s was my result:

W00t!
Mirroring
Mirroring helps build symmetric levels. Build on one half of an area, and Octave will reflect what you do on the other half.
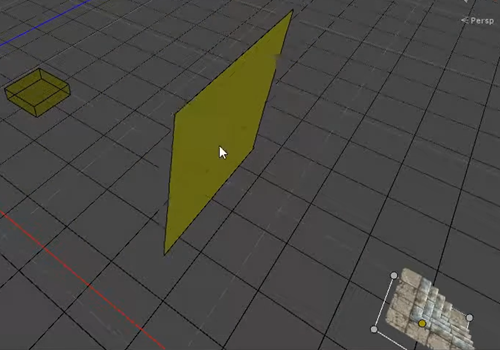
The mirror, in the center, will duplicate the object on the left, in the location shown on the right.
Mirroring when inserting new prefabs
Start by choosing a prefab you want to reflect. You’ll see where its reflection will be placed. That makes it easier to work with (for me, anyway).
You need to move the mirror into position. Click the Manipulate button (gizmos must be on to see the mirror):
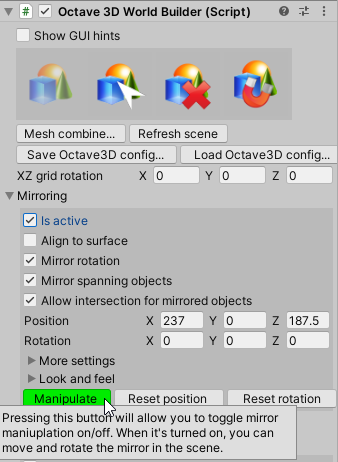
The mirror rests on the surface of the grid. I couldn’t work out how to make it rest on the surface of a terrain. Maybe it can do that.
Move the mirror around with the mouse. Hold down Ctrl to turn off snapping, although you would usually want to use snapping. Press Y to rotate the mirror 90 degrees.
To rotate in less than 90 degree increments, hold Shift+C and use the mouse.
Hold down Q and move the mouse to move the mirror up and down.
Once the mirror is in position, press Enter to exit manipulation mode, and lock the mirror in place.
Here I have a market stall near a mirror (in insert|point and click mode):
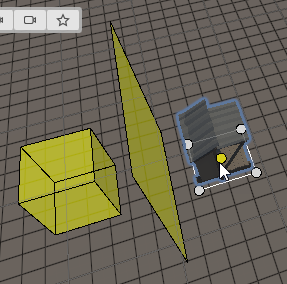
I click and…
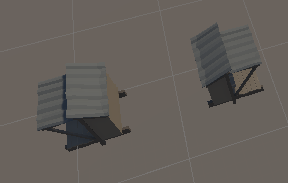
W00t! I can make a complete farmer’s market that way.
This works with block insertion, so you can make large areas quickly.
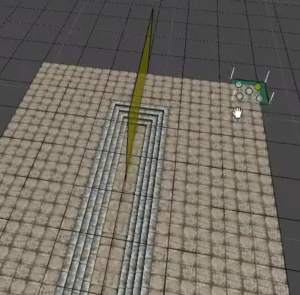
More w00t!
BTW, the mirror is short, and you can’t stretch it. That doesn’t matter. The entire plan the mirror defines is reflecty, as you can see above. You can make the mirror wider, if you want. That’s in the mirroring look-and-feel settings.
As you working, you might want to place an object or two without mirroring. Maybe a prop that appears only on one side. You can turn mirroring off…
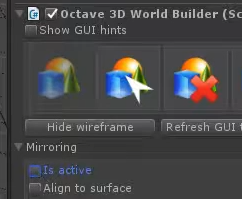
… add the prop, then turn it on again to continue.
There are some more settings.
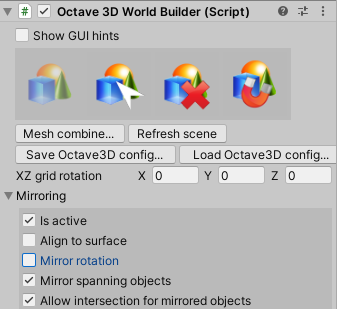
Mirror rotation: when you click to mirror an object, its rotation is copied as well. Unless this is off. Then only the position is copied.
Mirror spanning: when objects are close to the mirror, so the duplicate will overlap the original, click, and you’ll have two overlapping objects. Uncheck the option to prevent reflecting when there is an overlap.
Allow intersection I didn’t understand. Maybe when I try it more.
Mirroring selected objects
Another way cool thing. Select some objects with mirroring on.
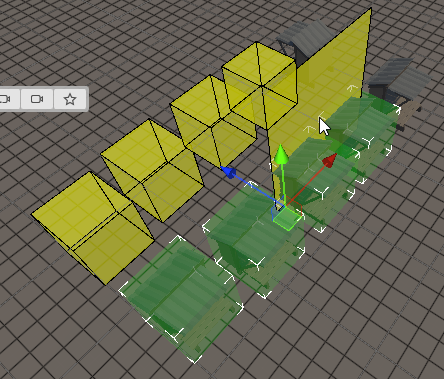
Now press the M key:
